Ever wondered why some beef dishes feel like butter in your mouth? Others make you chew for what feels like forever. It’s all about the meat and how it’s cooked.
This guide is your key to a tender, tasty beef dish. It’s more than just a recipe. It’s a detailed guide to making a meal that will wow your loved ones.
You’ll learn how to pick the perfect meat, the art of seasoning, and the best cooking method for you. We cover slow cookers, ovens, and Dutch ovens.
We’ll dive into the science of tenderizing meat. And we’ll show you how to turn pan drippings into a rich, delicious gravy. This gravy will make your meal complete.
By the end, you’ll be ready to make a beef dish that’s a true classic. It’ll be perfect for Sunday dinners and special events.
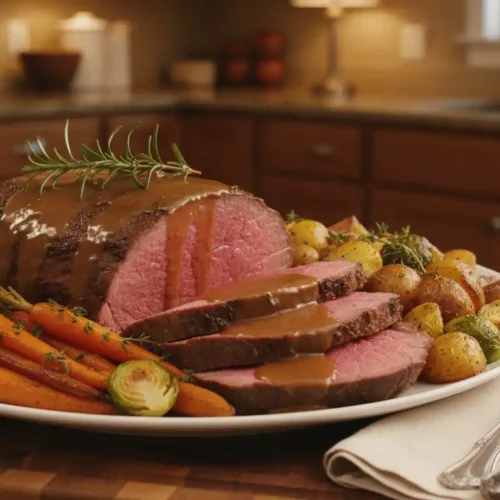
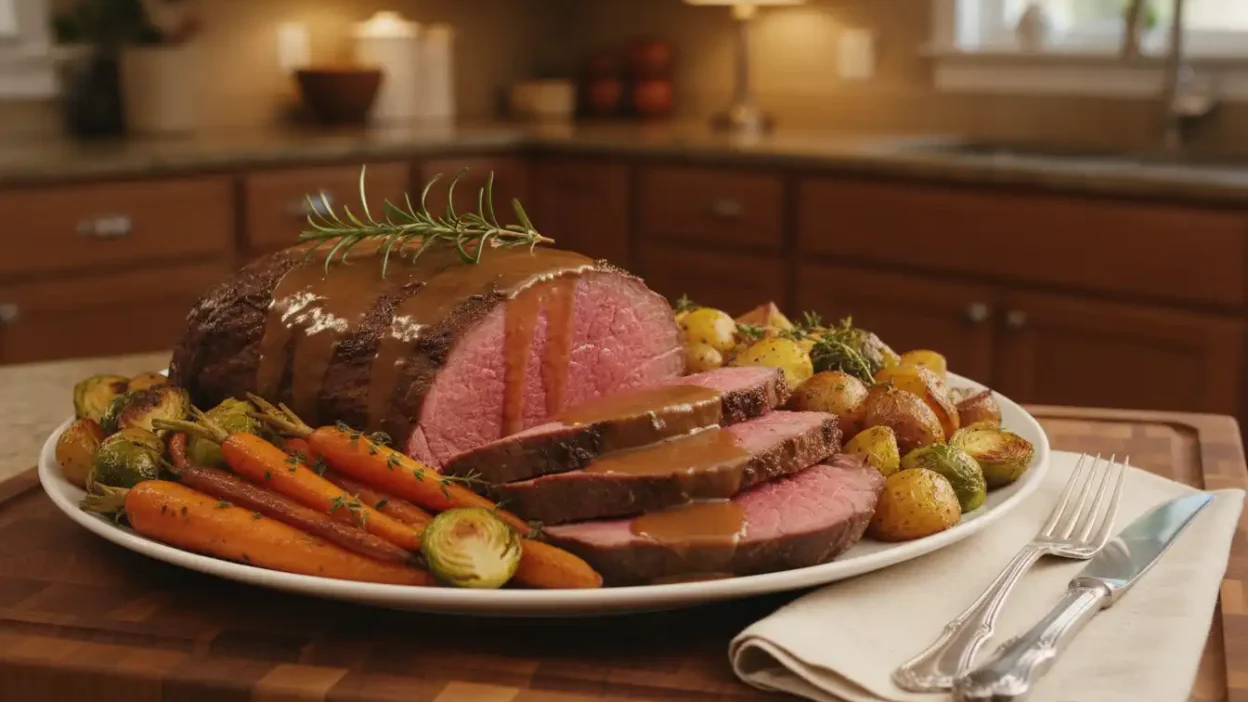
Easy Rump Roast Recipe with Rich Gravy and Seasoning
Equipment
- Slow cooker, Dutch oven, roasting pan, cutting board, chef knife, measuring spoons, measuring cups, mixing bowl, meat thermometer, whisk, saucepan
Ingredients
- 3 to 4 lb rump roast
- 2 teaspoons kosher salt
- 1 teaspoon black pepper
- 1 teaspoon garlic powder
- 1 teaspoon onion powder
- 1 teaspoon smoked paprika
- 1 teaspoon dried thyme
- 1 large yellow onion chopped
- 3 carrots chopped
- 2 celery stalks chopped
- 2 cups beef stock or bone broth
- 1 tablespoon Worcestershire sauce
- 1 tablespoon tomato paste
- 1 teaspoon dried porcini mushroom powder optional
- 2 tablespoons high-heat cooking oil
- For the Gravy
- Pan drippings from the roast
- 2 tablespoons flour or gluten-free flour blend
- 1 cup beef stock
- Salt and pepper to taste
Instructions
- Pat the rump roast dry and trim excess fat, leaving a thin layer for flavor.
- Mix salt, pepper, garlic powder, onion powder, paprika, and thyme.
- Rub the seasoning mixture over the entire roast.
- Let the roast rest for 30–45 minutes.
- Heat oil and sear the roast on all sides until browned.
- Place onions, carrots, and celery in the slow cooker or Dutch oven.
- Add beef stock, Worcestershire sauce, tomato paste, and mushroom powder.
- Place the roast on top of the vegetables.
- Cook on low for 8–10 hours (or in a Dutch oven at 300°F / 150°C until tender).
- Remove the roast and let it rest for 15–20 minutes before slicing.
- Collect drippings and prepare gravy by whisking in flour and stock until thickened.
- Slice against the grain and serve with gravy.
Notes
Notes
- Low and slow cooking produces the most tender results.
- USDA Choice grade beef provides better marbling and flavor.
- Letting the roast rest before slicing helps retain juices.
- Slice against the grain for maximum tenderness.
Nutrition (Approximate per Serving)
- Calories: 450 kcal
- Protein: 42 g
- Carbohydrates: 8 g
- Fat: 27 g
- Saturated Fat: 10 g
- Fiber: 2 g
- Sugar: 3 g
- Sodium: 780 mg
- Cholesterol: 120 mg
1. Understanding Rump Roast: Choosing the Right Cut for Your Meal
The type of rump roast you pick can really change how your meal tastes and feels. This beef comes from the cow’s backside, making it lean but full of flavor. When cooked right, it becomes the star of any dinner. Let’s explore why rump roast is a great choice and how to pick the best beef for your dish.
What Is a Rump Roast and Why It Makes an Excellent Choice
Defining the rump roast cut and its characteristics
A rump roast is a muscle that’s worked hard, which makes it firm. It’s known for its deep beef taste and is cheaper than tender cuts. Cooking it low and slow makes it tender and juicy.
Comparing rump roast to other beef cuts including beef cheek meat
Rump roast is a good mix of lean and flavorful, unlike chuck roast or beef cheek meat. Beef cheek meat is tender because of its collagen, but rump roast is better for slicing. It’s perfect for a classic beef rump roast recipe.
Selecting Quality Beef for Maximum Tenderness
Identifying marbling and freshness indicators
When picking a rump roast, look for a bright red color and fine grain. The marbling, or fat streaks, is key for moisture. Good marbling keeps the meat juicy and flavorful.
Understanding the difference between choice and select grade
Choosing between USDA Choice and Select grades matters. Always go for Choice if you can, as it has more marbling. This means your beef rump roast will be tender and tasty, making your recipe a hit.

2. Essential Ingredients and Seasonings for the Perfect Rump Roast Recipe
The right ingredients can make your simple rump roast recipe a hit. You need pantry staples that boost the beef’s flavor without overpowering it. Here’s how to start.
Gathering Your Pantry Staples
First, mix a balanced seasoning blend. Start with:
- Kosher salt – for flavor
- Freshly cracked black pepper – adds heat
- Garlic powder – for depth
- Onion powder – complements the beef
- Smoked paprika – for smokiness
- Dried thyme – adds earthiness
Then, pick your aromatics and vegetables. Use yellow onion, carrots, and celery for the mirepoix. This mix is key for a rich braising liquid.
Creating a balanced seasoning blend
Blend your seasonings to highlight the beef. Aim for a rub that boosts the meat’s richness and adds flavor layers.
Selecting aromatics and vegetables
Fresh vegetables add flavor and texture. Diced onions, carrots, and celery blend well, creating a savory base.
Building Layers of Flavor in Your Rump Roast
To elevate your dish, focus on flavor layers. Use herbs and spices strategically.
The role of herbs and spices in tenderizing
Herbs like rosemary and thyme do more than add scent. They tenderize the meat and enhance flavor.
Incorporating umami-rich ingredients
For a deep, savory taste, use umami-rich ingredients. Avoiding wine and pork, try:
- Worcestershire sauce – for tangy depth
- Concentrated beef stock or bone broth – adds richness
- Tomato paste – enhances umami
- Dried porcini mushroom powder – for earthy flavor
These ingredients add complexity and mouthfeel, making your simple rump roast recipe unforgettable.

3. How to Make a Tender Rump Roast: Preparation Steps
To get a tender rump roast, start with the right preparation. It’s not just about cooking; it’s about the steps before. Make sure your roast is thawed completely. The best way is to thaw it in the fridge for 24 to 48 hours.
After thawing, take the roast out of the fridge an hour before cooking. Let it sit at room temperature. This step helps cook the meat evenly. It prevents the outside from getting too hard while the inside cooks to perfection.
Properly Preparing Your Rump Roast Before Cooking
Thawing and bringing meat to room temperature
Thawing your roast right is key to a juicy, tender dish. Letting it come to room temperature ensures even cooking. It makes the meat tender by relaxing the proteins.
Trimming excess fat while preserving flavor
Rump roast is lean but might have a lot of fat. Trim the fat cap to about a quarter-inch. This keeps the meat moist without making it greasy. Trimming right helps keep the flavor rich and the meat lean.
Seasoning Techniques for Maximum Flavor Penetration
After prepping, it’s time to season. You can use dry rubbing or wet marinades. Each method has its own benefits, depending on what you like.
Dry rubbing versus wet marinades
Dry rubbing adds a flavorful crust when seared. Wet marinades, with oil, acid, and herbs, tenderize and flavor the meat. Choose based on your taste.
Allowing adequate resting time for seasoning
Let the roast rest after seasoning, at least 30 to 45 minutes. This lets the salt enhance flavor and tenderize the meat. It starts breaking down tough proteins, making the roast tender.
4. Rump Roast Recipe Slow Cooker Method: Set It and Forget It
Turn your rump roast into a tender treat with a slow cooker. It’s great for those who are busy but want a tasty meal. The crock pot’s gentle heat makes the lean cut tender and easy to fork.
Setting Up Your Slow Cooker for Optimal Results
For the best results, set up your slow cooker right. Start by putting dense veggies like potatoes and carrots at the bottom. They cook slower and soak up the braising liquid well.
- Potatoes: Cut into chunks for even cooking.
- Carrots: Slice into thick rounds to enhance flavor.
- Onions: Add whole or quartered for sweetness.
Then, put your seared rump roast on top of the veggies. Pour beef stock and seasonings around it, making sure not to wash off the rub. This way, the flavors meld together beautifully.
Choosing the Right Temperature Settings
For a rump roast recipe crock pot, use the low setting. Cooking on low for 8 to 10 hours breaks down the collagen, making the roast moist and tender. Don’t open the lid too often; it lets heat out and adds to cooking time.
Cooking Times and Monitoring Progress
Knowing cooking times is key for perfect doneness. On low, it takes about 8 to 10 hours, while high settings cook it in 4 to 6 hours. But, low and slow is best for tender results.
Low Versus High Settings: What to Choose
Always choose low for temperature settings. It cooks the meat evenly and prevents it from becoming tough. If you’re in a rush, high can work, but it won’t be as tender.
When to Check for Doneness
To check if it’s done, insert a fork into the thickest part of the roast. If it slides in easily and starts to pull apart, it’s ready. This is a better guide than a timer alone.
5. Rump Roast Recipe Oven: Classic Roasting Techniques
Roasting a rump roast in the oven is a classic method. It makes the meat brown and sliceable. The oven’s gentle heat cooks the roast evenly and adds flavor.
Preparing Your Oven and Roast for Roasting
To begin, preheat your oven to 325°F (163°C). This temperature is perfect for a slow roast. It ensures the meat cooks evenly.
Preheating and positioning your rack
Place your oven rack in the lower third. This spot helps air circulate around the roast. Make sure your oven is hot before putting in the roast.
Using a roasting pan or Dutch oven in the oven
Choosing the right cooking vessel is key. A heavy roasting pan with a rack is good. But a Dutch oven is even better. Its tight lid traps steam, making the meat tender and creating a caramelized crust.
Achieving the Perfect Internal Temperature
Use an instant-read thermometer to check for doneness. For a tender roast, aim for:
- Medium-Rare: 130-135°F
- Medium: 140-145°F
- Well-Done: Avoid if possible, as it can lead to dryness.
The importance of resting after roasting
After reaching the right temperature, let the roast rest. Tent it with foil and rest for 15-20 minutes. This lets the meat relax and reabsorb juices, making each slice moist and flavorful.
6. Slow Cooked Rump Roast Recipe: Mastering the Dutch Oven Method
Want to take your cooking to the next level? Mastering the Dutch oven method for your rump roast is key. This heavy, thick-walled pot is a kitchen powerhouse. It provides the perfect environment for slow cooking.
Using a Dutch oven not only enhances flavor but also ensures a tender and juicy result.
Why Dutch Oven Cooking Creates Superior Results
There are several reasons why the Dutch oven is the preferred choice for a slow cooked rump roast recipe:
- Heat retention and distribution benefits: The cast iron material of a Dutch oven retains heat exceptionally well. This means that once it’s hot, it stays hot, allowing for even cooking without temperature fluctuations.
- Achieving restaurant-quality sear and braise: The Dutch oven allows you to sear the roast directly on the stovetop, creating a deep, flavorful crust that enhances the overall taste of the dish.
Step-by-Step Dutch Oven Rump Roast Process
Now that you understand the benefits, let’s dive into the step-by-step process of preparing your rump roast in a Dutch oven.
Searing the roast to lock in juices
Start by heating a small amount of high-smoke-point oil in your Dutch oven over medium-high heat. Season your roast generously and sear it on all sides until a rich, mahogany crust forms. This step develops complex flavors through the Maillard reaction, creating a delicious foundation for your dish.
Braising and finishing in the Dutch oven
Once seared, remove the roast and sauté your choice of aromatics, such as onions and garlic, in the same pot. Deglaze the pot with rich beef stock to lift the flavorful browned bits from the bottom. Return the roast to the pot, secure the lid, and transfer it to a low oven (around 300°F) for a long, gentle braise. This combination of searing and moist heat will yield a slow cooked rump roast recipe that is truly exceptional.
7. Creating a Rich Gravy from Your Rump Roast Drippings
After you’ve perfected your braised rump roast recipe, it’s time to make a rich, savory gravy. This step makes your meal even better and ensures no flavor is wasted. Let’s explore how to turn your drippings into a delicious gravy.
Collecting and Preparing Drippings for Gravy
To begin, collect the flavorful drippings from your roasting pan. These juices are full of flavor and are the base of your gravy.
Separating fat from pan juices
The first step is to separate the fat from the juices. A fat separator is a great tool for this. It lets you pour the juices while leaving the fat on top. If you don’t have one, let the drippings settle and then spoon off the fat, keeping a bit for your roux.
Choosing thickeners: flour versus cornstarch
Next, choose a thickener. Traditional gravies use flour for a creamy texture. For a gluten-free option, use a 1:1 gluten-free flour blend. Or, you can mix cornstarch with cold water for a clearer gravy.
Building a Flavorful Gravy from Scratch
Now, you’re ready to make your gravy. This is where the magic begins!
Adding aromatics and deglazing techniques
Start by heating your roasting pan or Dutch oven over medium heat. Add minced shallots or garlic and sauté until they’re soft. This step adds flavor to your gravy. Then, pour in your defatted drippings and some stock. Use a spoon to scrape up the caramelized bits stuck to the pan. This step is key for a deep, rich flavor.
Seasoning and adjusting consistency
Simmer your mixture, then whisk in your roux or slurry. Let it thicken to your liking. Season with salt and pepper at the end. This way, you can adjust the taste and consistency perfectly.
8. Best Rump Roast Recipe Slow Cooker: Expert Tips and Tricks
Creating the best rump roast recipe slow cooker style requires some expert tips. This section will help you solve common problems and learn advanced techniques. You’ll make a meal that everyone will remember.
Troubleshooting Common Slow Cooker Issues
One big challenge is getting a dry or tough rump roast. This usually happens because it’s not cooked enough. Let it cook for longer to break down the collagen into gelatin. If it’s tough, just add another hour or two.
Preventing dry or tough roast results
It’s important to watch the liquid levels. A slow cooker seals in moisture, so don’t overdo it. Use just a cup or two of stock. The meat and veggies will add their own juices, making the flavors richer.
Managing liquid levels throughout cooking
For a full meal like a pioneer woman rump roast, layer veggies like Yukon gold potatoes and carrots at the bottom. This adds flavor and ensures even cooking.
Advanced Techniques for Even Better Results
To boost your rump roast’s flavor, try using more than just beef stock. Mushroom broth adds an earthy taste, or a bit of brewed coffee can make the beef taste more savory. These can really improve your dish.
Adding vegetables and potatoes for a complete meal
While this guide focuses on beef, slow cooking works for other proteins too. Try a gluten free chicken dish cooked low and slow with aromatic veggies for a comforting meal.
9. Serving, Storing, and Reheating Your Rump Roast
Serving your rump roast is the final touch that completes your culinary masterpiece. You want to ensure that every aspect, from presentation to storage, enhances the flavor and enjoyment of your meal. Let’s explore how to make your rump roast shine on the dinner table and how to store any leftovers properly.
Presentation Ideas for Your Rump Roast
To create an appealing presentation, start by slicing your roast correctly. Slicing against the grain is key for tenderness. Look for the long muscle fibers in the meat and cut perpendicular to them. This makes each slice easier to chew.
Once sliced, arrange the pieces on a platter. Fan them out beautifully and drizzle some of your rich gravy over the top. This adds flavor and makes the dish visually appealing.
Classic rump roast recipe ideas for side dishes include:
- Creamy mashed potatoes
- Buttered egg noodles
- Simple rice pilaf
These sides are perfect for soaking up the delicious gravy. For a refreshing contrast, consider serving roasted root vegetables or a bright salad dressed with vinaigrette.
Slicing against the grain for tenderness
Remember, the way you slice the meat can significantly affect the dining experience. Take your time to cut the roast properly for the best results.
Pairing with side dishes and gravy
Pairing your rump roast with the right sides enhances the overall meal. Choose options that complement the rich flavors of the beef.
Proper Storage and Reheating Methods
After enjoying your meal, proper storage is essential. Cool the leftover roast and gravy separately within two hours of cooking. Store them in airtight containers in the refrigerator for up to four days.
If you want to keep them longer, slice the roast and freeze it submerged in its gravy. This protective liquid barrier prevents freezer burn and keeps the meat moist.
Refrigerating and freezing guidelines
When refrigerating, ensure that the containers are tightly sealed to maintain freshness. For freezing, label the containers with the date to keep track of how long they’ve been stored.
Reheating without losing moisture
The best way to reheat your rump roast is gently. Place the sliced beef and gravy in a covered skillet or saucepan over low heat. You can add a splash of beef stock if needed to keep it moist. Avoid using a microwave, as it can quickly overcook and toughen the meat.
Conclusion
You’ve learned how to make a delicious rump roast, from picking the right cut to serving it with rich gravy. This affordable choice becomes tender and tasty when cooked right. You can use a slow cooker, oven, or Dutch oven. Each method focuses on slow cooking, seasoning, and letting the roast rest.
The homemade gravy from drippings is key to a great meal. This guide helps you build flavors and keep the meat moist. If you’re short on time, try the instant pot method. It cooks the roast fast and tender.
No matter your choice, you’ll end up with a comforting meal that brings everyone together. Enjoy the journey and relish the outcome, knowing you’ve perfected the rump roast.
FAQ
What is the best way to cook a rump roast?
Cooking a rump roast low and slow is best. Use a slow cooker, Dutch oven, or oven at a low temperature. This makes the roast tender and flavorful.
How do I ensure my rump roast is tender?
For a tender roast, choose a good cut and let it warm up before cooking. Season it well. Cooking it slowly breaks down tough fibers.
Can I make a rump roast in a slow cooker?
Yes, you can make a rump roast in a slow cooker. Start with root vegetables on the bottom, then the roast, and a bit of beef stock. Cook on low for 8 to 10 hours.
What are some seasoning ideas for a rump roast?
Use a dry rub with kosher salt, black pepper, and spices. Add mirepoix and umami-rich ingredients like Worcestershire sauce for extra flavor.
How do I make gravy from rump roast drippings?
Separate the fat from the juices. Then, mix flour and fat or cornstarch with liquid to thicken. Deglaze the pan with stock and simmer until it thickens.
What is the ideal internal temperature for a rump roast?
For medium-rare, aim for 130-135°F. For medium, it’s 140-145°F. Use an instant-read thermometer for accuracy.
How should I store leftover rump roast?
Cool the roast and gravy separately within two hours. Store them in airtight containers in the fridge for up to four days. Freeze the sliced roast in gravy for longer storage.
Can I use an Instant Pot for a rump roast recipe?
Yes, an Instant Pot is great for rump roast. Pressure cooking makes it tender quickly, much faster than traditional methods.
What are some side dishes that pair well with rump roast?
Try creamy mashed potatoes, buttered egg noodles, or rice pilaf. Roasted root vegetables or a fresh salad with vinaigrette also pair well.