Turn an inexpensive, often-overlooked cut into a show-stopping meal: when cooked low and slow, beef cheek meat becomes silky, richly flavored, and ideal for both casual and special occasion plates.
Great results start with picking high-quality ingredients and the right equipment for slow cooking.
Many home cooks search for beef cheek meat where to buy because this collagen-rich cut transforms from a tough muscle into a velvety centerpiece when given time and gentle heat. Its unique texture stands apart from standard steaks and makes excellent tacos, stews, and braises.
You deserve a rewarding meal that reflects your effort. Follow this guide for shopping, prep, and step-by-step cooking methods that highlight the deep beef flavor of this cut.
Beef Cheek Meat
Equipment
- Dutch oven, chef's knife, cutting board, measuring cups, measuring spoons, tongs, wooden spoon, oven
Ingredients
- 3 lb beef cheeks trimmed
- 2 tbsp olive oil
- 2 tsp kosher salt
- 1 tsp black pepper
- 1 large onion diced
- 2 carrots diced
- 2 celery stalks diced
- 4 cups beef stock
- 2 tbsp tomato paste
- 2 sprigs fresh thyme
- 2 sprigs fresh rosemary
- 2 bay leaves
Instructions
- Trim silver skin and excess fat from the beef cheeks.
- Pat dry and season with salt and pepper.
- Heat olive oil in a Dutch oven over medium-high heat.
- Sear beef cheeks on all sides until browned.
- Remove meat and sauté onion, carrots, and celery.
- Stir in tomato paste.
- Add beef stock, thyme, rosemary, and bay leaves.
- Return beef cheeks to the pot.
- Cover and braise at 300°F (150°C) for about 3½ hours.
- Cook until fork-tender.
- Reduce sauce if desired.
- Rest for 15 minutes before serving.
Notes
- Trim all silver skin before cooking for the best texture.
- Sear the beef thoroughly to develop deep flavor.
- Keep the meat partially submerged in the braising liquid.
- Cook until fork-tender; additional time may be needed depending on size.
- Store leftovers in the braising liquid to maintain moisture.
Nutrition (Per Serving)
- Calories: 520 kcal
- Protein: 48 g
- Carbohydrates: 8 g
- Fat: 32 g
- Saturated Fat: 12 g
- Cholesterol: 145 mg
- Sodium: 780 mg
- Fiber: 2 g
- Sugar: 3 g
Suitable For
Lunch, Dinner, Family Meals, Special OccasionsStorage
Refrigerate in an airtight container for up to 4 days or freeze for up to 3 months. Reheat gently with some braising liquid.What Is Beef Cheek Meat and Why You Should Try It
Have you ever spotted beef cheek meat at the butcher counter? Chefs prize this cut for its rich texture and deep flavor. It comes from the cow’s facial muscles, the parts used constantly for chewing.
Because these muscles work hard, the cheeks are dense with connective tissue and collagen. Left untreated, that results in a tough bite. But handled correctly, the collagen converts to gelatin and yields a silky, luxurious mouthfeel you won’t get from most other cuts.

Understanding This Underrated Cut
Many home cooks shy away from beef cheek meat because of its appearance, but that connective tissue is the secret to its final texture. Slow, moist heat breaks collagen down into gelatin—think of it as a natural thickener that gives braises and stews body and a silky finish.
It’s also often more affordable than prime steaks like ribeye or tenderloin, making it a smart, budget-friendly option when you want restaurant-level results without the price tag.
What Is Beef Cheek Meat Used For
What is beef cheek meat used for? It shines in slow-cooked preparations. Traditional Mexican barbacoa uses this cut for tender, shred-ready filling for tacos. It’s equally at home in rich stews, spicy curries, or as a luxurious filling for ravioli.
For bistro-style presentations, braising the cheeks in a deeply reduced, non-alcoholic stock-based sauce produces the same glossy finish and concentrated flavor without using alcohol.
Nutritional Benefits and Flavor Profile
The nutritional benefits of beef cheek meat include a high protein content and valuable micronutrients such as Vitamin B12 and zinc (values vary by source and cut). Check USDA data for exact nutrient values if you need precise numbers.
Compared with fattier cuts, cheeks can be relatively lean while still delivering intense, savory, umami-rich flavor because of the concentrated muscle and gelatinous finish.
| Feature | Beef Cheek Mea | Beef Brisket | Chuck Roast |
| Primary Texture | Silky and Gelatinous | Fibrous and Chewy | Tender and Fatty |
| Flavor Intensity | Very High | Moderate | High |
| Best Use Case | Tacos and Braises | Smoking and BBQ | Pot Roasts |
| Collagen Level | Extremely High | High | Moderate |
Beef Cheek Meat Where to Buy and Pricing Guide
Finding beef cheek meat can take a bit of legwork, but it’s worth the effort for slow-cooked dishes that deliver big flavor. Sourcing from a trusted seller—local butcher, specialty market, or reputable online retailer—gives you better trimming options and fresher cuts.
Finding Beef Cheeks at Local Butchers and Markets
Start with independent butcher shops; they’re often the easiest place to request beef cheeks. If you don’t see them on display, ask the butcher to set some aside or to trim whole cheeks for you. Specialty Mexican grocery stores (carnicerias) frequently stock cheeks for traditional barbacoa, and some online meat suppliers ship pasture-raised options nationwide.

Beef Cheek Meat Price Expectations
Prices vary by region, quality, and whether the cheeks are pre-trimmed. Buying whole cheeks and trimming them yourself usually lowers the per-pound cost; purchasing pre-trimmed pieces or premium grass-fed options raises it. Buying in bulk from online sellers can also reduce the price per pound.
| Retail | Source | Average Price per LbAvailability | Best For |
| Local Butcher | $8.00 – $12.00 | Moderate | Custom Trimming |
| Mexican Market | $5.00 – $8.00 | High | Budget Cooking |
| Online Retailer | $11.00 – $16.00 | High | Premium Quality |
| Wholesale Club | $6.00 – $9.00 | Low | Bulk Buying |
Keep in mind the listed beef cheek meat price may not account for trim loss — you’ll likely remove silver skin and glands before cooking. Factor that into recipes and shopping lists when planning portions for a group.
How to Select Quality Beef Cheeks
When choosing beef cheeks, use your senses: look for deep red color, minimal pooling liquid, and firm texture. Some marbling is good — it helps flavor and tenderness when braised. Avoid pieces that look grey, overly wet, or slimy.
- Check the color: Aim for deep, healthy red tones.
- Inspect the fat: White, firm fat is ideal; avoid yellow or greasy deposits.
- Consider size: Choose pieces of similar size so they cook evenly.
Quick script to ask your butcher: “Do you have beef cheeks available, and can you trim and portion them for braising?” This often gets you the exact size and prep you need. For convenience, consider downloading or printing a simple shopping checklist with quantities and suggested stock-based braising liquids to bring to the store.
Preparing Your Beef Cheeks Before Cooking
How you handle beef cheek meat before it hits the pot determines the final result. Proper prep turns a tough, collagen-rich cut into a silky, flavorful centerpiece; skipping steps often leads to a chewy or greasy outcome.
Start by cleaning the meat. Beef cheek meat frequently carries a thick silver skin and pockets of hard fat. While some fat contributes flavor, excess or the inedible membrane prevents seasonings and liquids from penetrating the muscle.
When preparing beef cheeks, use a very sharp boning or chef’s knife to remove the silver skin and any glands. That membrane won’t break down during cooking; trimming it now ensures a smooth texture later. Practice safe, sanitary technique—trim over a clean board, discard trimmings promptly, and wash hands and tools.
After trimming, season thoroughly. This cut takes bold flavors well. Apply a dry rub or salt at least 30 minutes before cooking—for deeper flavor, you can season up to overnight in the refrigerator. If you refrigerate, bring meat back toward room temperature for 20 minutes before searing (do not exceed safe food-handling times).
Key prep tips for beef cheeks:
- Pat dry: Use paper towels to remove surface moisture for a better sear.
- Temper: Let trimmed cheeks rest ~20 minutes at room temp before cooking for even heat distribution.
- Trim glands: Cut away any remaining glands or discolored sections for a cleaner taste.
- Season to taste: Aim for roughly 1 to 1.5 teaspoons of kosher salt per pound as a starting guideline; adjust based on your rub and cooking time.
A little extra care now pays off: trimmed, properly seasoned cheeks absorb braising liquids better and develop a nicer crust when seared, giving you superior flavor and texture.
| Preparation Step | Action Required | Benefit for Beef Cheek Meat |
| Trimming | Remove silver skin and hard fat | Ensures maximum tenderness |
| Drying | Pat dry with paper towels | Creates a perfect golden crust |
| Seasoning | Apply salt and spices early | Enhances the deep, beefy flavor |
| Tempering | Rest at room temperature (≈20 minutes) | Promotes even heat distribution |
Best Cooking Methods for Beef Cheek Meat
To get the most from beef cheek meat, you need methods that soften lots of collagen without drying the muscle. This cut responds best to steady, even heat over time or to high pressure that speeds up collagen breakdown while preserving moisture.
Choose your technique based on the time you have and the texture you want: traditional slow cooking delivers deeper flavor, while modern appliances (pressure cookers, multicookers) offer speed with excellent results.
Slow Braising for Maximum Tenderness
Slow braising is the go-to when flavor and silky texture are your priorities. Sear the cheeks in a heavy pot to build color, then add a flavorful, non-alcoholic braising liquid (beef or vegetable stock, or a concentrated tomato reduction) and submerge the pieces halfway. Keep a gentle simmer and cook low and slow until the meat pulls apart with a fork.
Look for visual and tactile cues rather than rigid times: the cheeks are done when a fork slides in and the meat shreds with minimal resistance. Slow braises commonly take several hours depending on piece size.
Pressure Cooking to Save Time
Pressure cooking is ideal if you want that same tender, gelatinous result but have less time. Using an electric pressure cooker or Instant Pot can reduce a multi-hour braise to roughly one hour under high pressure, depending on the size of the cheeks. The high-pressure environment forces moisture into the fibers and accelerates collagen conversion without overcooking the interior.
Tip: if the meat is still tough after the cycle, seal and cook for an additional 10–15 minutes rather than increasing heat; then allow a natural pressure release for best texture.
Slow Cooker and Instant Pot Options
For true hands-off cooking, the slow cooker (ceramic crock) delivers consistently soft, fall-apart cheeks. Set to low and expect roughly 8–10 hours for a tender finish; this method is perfect for busy days. If using an Instant Pot, use the sauté function to brown, then switch to high-pressure for the shortened cook time to combine speed and flavor.
Adjust liquid levels for appliance: cover cheeks halfway for stovetop/oven braises, and use about 1 to 1.5 cups of stock for pressure cooker recipes unless your model manufacturer suggests otherwise.
| Cooking Method | Average Cook Time | Best FeatureTexture | Result |
| Slow Braising | 3 – 4 Hours (varies by size) | Deepest flavor development | Silky and rich |
| Pressure Cooking | 45 – 60 Minutes | Speed with tender results | Very tender, shred-ready |
| Slow Cooker | 8 – 10 Hours | Hands-off convenience | Fall-apart soft |
When to stop: use the fork test first — if the meat resists, give it more time. If you reach the upper end of the time range and cheeks are still firm, continue cooking and check liquid levels; adding a splash of hot stock and extending low heat or pressure often fixes the issue.
How to Braise Beef Cheeks to Perfection
Mastering the braise turns tough beef cheeks into a tender, luxurious dish. Braising uses low, moist heat over an extended time to convert collagen into gelatin, yielding that silky texture and concentrated flavor home cooks love.
The technique starts on the stove and finishes in the oven for even heat distribution. Follow these steps for a reliable braise that makes the most of this value cut.
Searing Your Beef Cheeks Properly
Begin by patting the cheeks dry and seasoning with salt and pepper. Heat a heavy Dutch oven or pot over medium-high with a couple tablespoons of oil. Sear without overcrowding: brown each piece until a deep mahogany crust forms — roughly three to four minutes per side for medium-sized pieces, though larger pieces will take longer.
Searing is about flavor building, not doneness; those browned bits are the foundation of your sauce.
Building Flavor with Aromatics and Liquids
After removing the meat, use the rendered fat to sauté your aromatics — typically onion, carrot, and celery — scraping up browned bits as they soften. When the vegetables are translucent, deglaze the pot with a non-alcoholic option such as beef or vegetable stock, a concentrated tomato reduction, or unsweetened grape juice with a splash of vinegar for acidity. Add herbs and return the cheeks to the pot.
Pour enough liquid to come halfway up the sides of the meat (about half to two-thirds coverage). That balance keeps the cheeks moist while allowing the top to brown slightly during the long simmer.
Temperature and Timing Guidelines
The secret to braising is steady, low heat. A gentle simmer or oven set to a low temperature prevents the meat from tightening and drying. Many cooks use the oven for consistent results; aim near 300°F (150°C) as a general starting point and monitor tenderness rather than obsessing over the clock.
| Method | Ideal Temperature | Cooking Time | Meat Texture |
| Oven Braise | 300°F (150°C) | 3.5 – 4 Hours (varies by size) | Fork tender |
| Stovetop Simmer | Low heat, gentle bubble | 3 – 4 Hours | Rich and silky |
| Slow Cooker | Low setting | 8 – 10 Hours | Fall-apart soft |
Check doneness with the fork test: the cheeks are ready when the fork slides in easily and the meat pulls apart without resistance. If they’re still firm at the end of the listed time, continue cooking — collagen conversion can be unpredictable and benefits from extra patience.
Finish the sauce by removing the meat, skimming excess fat, and simmering the braising liquid until it reduces to a glossy consistency. For a smoother sauce, strain and then whisk in a knob of butter or a splash of stock just before serving. Let the cheeks rest in their juices for about 15 minutes to redistribute moisture before plating.
Editor tip: oven temperatures vary—use an oven thermometer and prefer visual/tactile cues over strict timing, and remember that larger pieces will require more time to become tender.
Smoking Beef Cheek Meat for Bold Barbecue Flavor
For a smoky, deeply flavored result, try smoking beef cheek meat low and slow. Given the cheeks’ high collagen content, a patient smoke lets the wood aromas penetrate and the connective tissue convert to gelatin, producing a tender, melt-in-your-mouth finish.
Smoking this cut requires steady temps, good airflow, and regular monitoring. Keep the heat low so fat renders evenly and the exterior develops a dark bark that helps lock in juices.
Wood choice matters: strong woods like hickory or oak give classic, savory notes, while fruitwoods add a sweeter, fruit-forward accent that complements the natural beef flavor.
- Maintain a smoker temperature between 225°F and 250°F for consistent results.
- Use a water pan or a pan of diluted stock to maintain humidity and prevent the surface from drying.
- Spritz with apple juice, diluted stock, or brewed tea every hour to boost moisture — avoid alcoholic spritzes.
- Monitor tenderness rather than rigid temps; many pitmasters wrap when the meat reaches the “stall” and tenderness improves after wrapping.
| Wood Type | Flavor Profile | Intensity Level |
| Oak | Medium smoky and versatile | Medium |
| Hickory | Strong, savory notes | High |
| Pecan | Sweet, mild nutty flavor | Medium-Low |
| Cherry | Sweet and fruity with rich color | Low |
Wrapping options: use foil for faster finishing and a softer bark, or butcher paper for a firmer bark and better moisture exchange. For smaller cuts like cheeks, avoid overcooking — probe placement matters (insert the thermometer into the thickest part without touching bone or fat) and watch texture: when the meat pulls apart easily it’s done.
Resting: let smoked cheeks rest in a warm cooler or loosely tented with foil for 30–60 minutes to allow juices to redistribute before shredding and serving. This helps the final texture and brings out the best end result.
Delicious Recipes Using Cooked Beef Cheeks
Once your beef cheek meat reaches that melt-in-your-mouth stage, it becomes an incredibly versatile ingredient. Use it for casual street-food style plates or elevated dinner dishes—the rich, gelatinous texture carries flavor beautifully.
Below are three simple, dependable ways to turn cooked cheeks into memorable meals. Each option highlights the cut’s deep savory profile and offers easy variations.
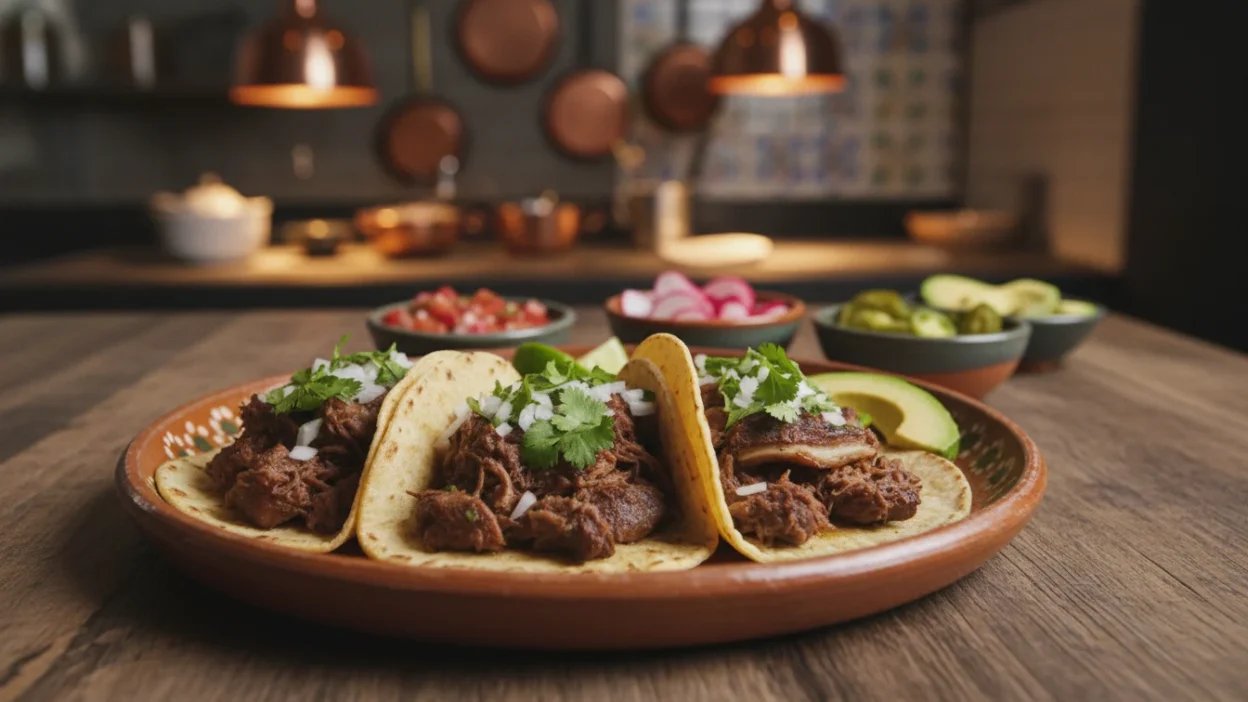
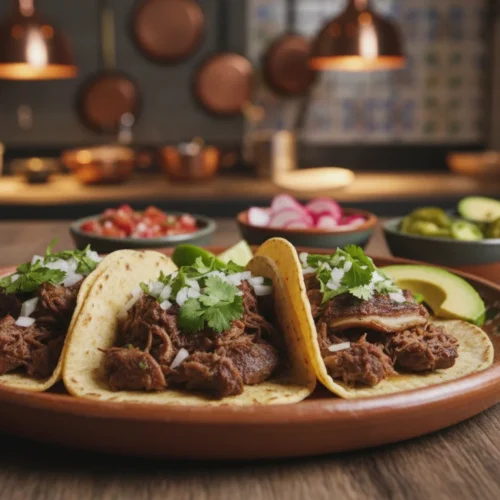
Authentic Beef Cheek Tacos
Shred warm cheeks with two forks until they fall into tender strands. Serve on charred corn tortillas and top with finely chopped white onion, fresh cilantro, and a squeeze of lime for brightness.
- Quick assembly: shredded cheeks, tortillas, onion, cilantro, lime.
- Optional heat: salsa verde or a smoky chipotle salsa for contrast.
- Serving tip: warm tortillas on a hot griddle and keep toppings simple so the beef remains the star.
Hearty Beef Cheek Stew
Use pre-cooked or braised cheeks in a chunky stew with carrots, potatoes, and celery. Simmer gently in a rich, reduced stock until vegetables are tender and the gelatin from the cheeks naturally thickens the sauce.
Add a splash of Worcestershire sauce and fresh thyme for depth, then serve in deep bowls with crusty sourdough to soak up the intense gravy.
Bistro-Style Stock-Braised Cheeks
For an elegant dinner, finish cheeks in a deeply reduced, stock-based braise (no alcohol needed). Use concentrated beef stock or a roasted tomato reduction plus a splash of aged vinegar or unsweetened grape juice with a touch of vinegar for acidity. Reduce the braising liquid until glossy and spoon it over creamy mashed potatoes or buttery polenta.
Garnish with robust herbs like rosemary or flat-leaf parsley and serve with simple vegetables to let the rich flavors shine.
| Recipe Name | Key Flavor Profile | Best Side Dish | Primary Keyword |
| Street Tacos | Zesty and fresh | Mexican street corn | tacos |
| Classic Stew | Savory and earthy | Crusty bread | stew |
| Bistro Style | Rich and elegant | Mashed potatoes or polenta | stock-braised |
Beef Cheeks as a Brisket Alternative and Roast Comparisons
If you’re browsing roast options, beef cheeks are a compelling alternative to brisket or larger roasts. They deliver an intense, gelatinous richness once braised and are often easier to portion and serve for small groups.
Though overlooked at many counters, beef cheek meat brings a unique mouthfeel and concentrated taste that sets it apart from other common roasts.
Beef Cheeks Versus Brisket
Brisket is beloved for barbecue and slow smoking but can be challenging to master because of its size and variable fat distribution. Cheeks contain abundant collagen and connective tissue that converts to gelatin during low-and-slow cooking, producing glossy sauces and a silkier texture. Because cheeks are smaller and more uniform in shape, they’re often more forgiving in long cooks — they tolerate extended braising without drying out as quickly as leaner slices might.
Best Cut for Pot Roast: Chuck Roast vs Rump Roast
Choose chuck roast if you want juicy, sliceable pot roast with plenty of marbling that stands up to long braises. Rump roast is leaner and better when you want clean, sliceable portions but requires extra liquid or shorter cooking to avoid dryness.
Understanding Different Types of Beef Roasts
Roasts generally fall into dry-heat and moist-heat categories. Tender cuts (ribeye, tenderloin) are ideal for quick, dry roasting. Tougher cuts such as shoulder, leg, and cheeks benefit from moist, slow cooking to turn collagen into gelatin.
| Beef Cut | Best Cooking Method | Primary Texture | Fat Content |
| Beef Cheeks | Slow Braising | Silky & Shredded | High (collagen-rich) |
| Brisket | Smoking / Braising | Fibrous & Sliced | Moderate to high |
| Chuck Roast | Pot Roasting | Tender & Marbled | High |
| Rump Roast | Slow Roasting | Firm & Lean | Low |
Which to Choose — Quick Guide
- Choose beef cheeks if you want rich, shred-friendly meat for tacos, stews, or elegant braised plates.
- Choose brisket if you’re smoking whole and want sliceable, smoky results for larger gatherings.
- Choose chuck roast for classic pot roast with plenty of gravy and juicy slices.
- Choose rump roast when you want leaner slices and a roast that presents well on the plate.
For more on prep and cooking times, see the Prep and Best Cooking Methods sections above — matching the right cut to your desired end result and size will make planning easier.
Storing and Reheating Leftover Beef Cheek Meat
Knowing how to properly store and reheat your cooked beef cheek meat preserves its tender texture and ensures safe, delicious leftovers. Handle cooled food promptly and use gentle reheating methods to keep the meat soft and gelatinous.
Food-safety note: cool cooked meat to room temperature and refrigerate within 2 hours (sooner in hot environments). Use airtight containers or heavy-duty freezer bags to limit air exposure. A pro tip is to store the cheeks in their braising liquid or add enough stock to cover — that helps retain moisture and flavor.
| Storage Method | Recommended Time | Best Practices |
| Refrigeration | 3 to 4 Days | Store in airtight glass containers; label with date. |
| Freezing | 2 to 3 Months | Use vacuum-sealed bags or heavy freezer bags; remove excess air. |
| Liquid Storage | Same as above | Keep meat covered in sauce or broth to prevent drying. |
When reheating, avoid high, direct heat that can tighten proteins and make the meat tough. Aim to warm gently until the center is hot:
- Stovetop: place shredded or whole cheeks with 1/4–1/2 cup stock per cup of meat in a small pot, cover, and heat over low until warmed through.
- Oven: preheat to 300°F, wrap meat with a splash of broth in foil, and heat until warmed (checking after 15–20 minutes for small portions).
- Sous-vide/Steam: ideal for preserving texture — reheat sealed with a bit of braising liquid at 140°F–150°F until warm.
If frozen, thaw overnight in the refrigerator before reheating. Label containers with the date to manage rotation. Leftovers often deepen in flavor after a day in the fridge, so plan ahead: use refrigerated cheeks within 3–4 days for best quality and safety.
Common Mistakes to Avoid When Cooking Beef Cheeks
Cooking beef cheek meat well takes patience. This collagen-rich cut rewards time and gentle technique — skip steps and you risk a tough, stringy result.
Undercooking and Rushing the Process
The top mistake is rushing the cook. Cheeks need long, slow heat to convert connective tissue into gelatin. If you stop too early the meat will be chewy and rubbery.
Use the fork test: the cheeks are done when a fork slides in easily and the meat pulls apart with minimal resistance. Depending on method and size, this can take several hours.
Using Insufficient Liquid
Not using enough braising liquid can leave the outside dry and prevent even collagen breakdown. Keep the meat partially submerged (about half to two-thirds covered) and check liquid levels during the cook.
If the pot is running low, add hot beef or vegetable stock, concentrated tomato reduction, or a splash of verjuice or aged vinegar mixed into stock to restore moisture and acidity without alcohol.
Skipping the Searing Step
Skipping the initial sear to save time costs you flavor. A proper sear creates browned bits that deepen the final sauce and gives better overall complexity.
Brown all sides over medium-high heat in a heavy pan, using oil and working in batches if needed so you don’t steam the meat.
| Mistake | Result | Solution |
| Undercooking | Tough, chewy texture | Cook until fork-tender; allow extra hours if needed |
| High Heat | Dry, stringy fibers | Maintain a low simmer or steady pressure |
| No Searing | Bland flavor profile | Brown all sides first to build depth |
Quick Checklist
- Trim silver skin and glands before seasoning.
- Pat dry and season (salt + pepper) at least 30 minutes before cooking.
- Sear in a hot pan to develop color.
- Keep cheeks partially submerged in hot stock; top up as needed.
- Use the fork test — don’t rely solely on time or temperature.
Conclusion
You now have the tools to turn a tough, inexpensive cut into a restaurant-quality dish. When treated with time and gentle heat, beef cheeks develop a rich, concentrated flavor and an irresistibly silky texture that’s hard to find in other roasts.
These techniques—proper trimming, a good sear, and low-and-slow braising or smoking—help keep the cheeks moist and tender. Whether you finish them in a slow cooker, an oven braise, or an Instant Pot, the result is a flexible centerpiece for tacos, stews, or an elegant dinner with mashed potatoes or polenta.
Where to buy: look to local butchers, specialty markets, and reputable online sources for quality cheeks; availability varies by region. Try the simple taco recipe in this guide first to see how dramatic the transformation can be.
Ready to cook? Print the shopping checklist, bookmark this page, or subscribe for more step-by-step recipes and tips. With a little patience, beef cheeks can become your go-to cut for a cozy, impressive meal any day of the week.
You may also enjoy these recipes:
FAQ
Is beef cheek meat good for dogs?
Plain, cooked beef cheeks can be a protein-rich treat for dogs, but avoid onions, garlic, excessive salt, and spices — these are harmful to pets. Always consult your veterinarian before introducing new foods.
What is the main difference between rump roast vs chuck roast?
The primary difference is the muscle and fat content: chuck roast (shoulder) is well-marbled and ideal for braising or slow-cooker dishes, while rump roast (hindquarters) is leaner and better suited to roasting and slicing.
Can I use beef cheeks as a brisket alternative for smoking?
Yes. Beef cheeks are smaller and often cook faster than brisket; with low-and-slow smoking they develop great tenderness and a rich, gelatinous finish. See the Smoking and Best Cooking Methods sections for timing and tips.
Which is the best piece of beef to roast for a traditional Sunday dinner?
For a classic roast, choose according to the desired outcome: pick chuck for a juicy pot roast, rump for leaner slices, or beef cheeks if you want a braised, melt-in-your-mouth centerpiece. Cheeks are especially good when you want rich gravy and tender shreds.
Shoulder roast vs chuck roast: which should I choose for a slow cooker?
Choose chuck roast for the slow cooker — its marbling helps it stay moist during long hours of low heat. Shoulder cuts work too but may need slightly more liquid or careful timing.
What is the average beef cheek meat price per pound?
Prices vary by region and quality; a typical range is roughly $6–$16 per pound depending on source and whether the cheeks are pre-trimmed. Check local butcher listings or our pricing guide above for details.
What are the most common types of beef roasts found in the US?
Common US roasts include chuck roast, rump roast, top round, and sirloin tip — each varies in fat content and the recommended cooking way. Refer to the Roast Comparisons section to match the cut to your plan.