Want to make an entremet cake that looks like it came from a Paris patisserie? This guide walks you through building a multi-layered French dessert—sponge, mousse, and glossy mirror glaze so you can serve a showstopping cake for birthdays, holidays, or special occasions.
Be realistic: a classic entremet is an advanced recipe best spread over 2–3 days, but it’s absolutely achievable at home with careful planning and the right techniques. Expect to spend focused time on preparation, freezing layers, and the final glazing. Serves about 8–12 depending on portion size.
Along the way you’ll learn mousse and sponge techniques, how to work with chocolate and fruit purees, and creative decoration ideas (think Harry Potter birthday cake or a mermaid cake theme). Read on for tools, ingredients, and step-by-step assembly so you can make a memorable dessert that tastes as good as it looks.
Mirror Glaze for Entremet Cake
Equipment
- Digital scale, instant-read thermometer, saucepan, mixing bowl, immersion blender, fine-mesh sieve, spatula, wire rack, baking sheet.
Ingredients
- 200 g granulated sugar
- 200 g water
- 200 g sweetened condensed milk
- 150 g chopped white or dark chocolate
- 12 –15 g powdered gelatin bloomed in cold water
Instructions
- Bloom the gelatin in cold water.
- Heat the sugar and water until fully dissolved.
- Remove from the heat and stir in the sweetened condensed milk.
- Pour the mixture over the chopped chocolate.
- Let stand for 1 minute.
- Stir until smooth.
- Add the dissolved gelatin.
- Blend gently with an immersion blender, avoiding air bubbles.
- Strain through a fine-mesh sieve.
- Cool to 90–95°F (32–35°C).
- Pour over a completely frozen entremet cake placed on a wire rack.
- Allow the excess glaze to drip before transferring the cake to a serving plate.
Notes
- Pour the glaze between 90–95°F (32–35°C).
- The cake should be completely frozen before glazing.
- Straining removes bubbles for a smoother finish.
- Reheat gently if the glaze thickens.
- Do not boil after adding the gelatin.
- Use high-quality chocolate for the best shine.
Storage
- Refrigerate glazed cakes for 2–3 days.
- For longer storage, freeze the entremet without the glaze and glaze before serving.
Nutrition (Mirror Glaze Only – Approximate per serving)
- Calories: ~170 kcal
- Carbohydrates: 28 g
- Protein: 2 g
- Fat: 6 g
- Saturated Fat: 4 g
- Cholesterol: 8 mg
- Sodium: 30 mg
- Sugar: 27 g
- Fiber: 0 g
Note: These values represent the mirror glaze only, not the entire entremet cake. The total calories of a finished entremet vary greatly depending on the sponge, mousse, inserts, and decorations.
1. Entremet Cake Design: Understanding the French Pastry Art
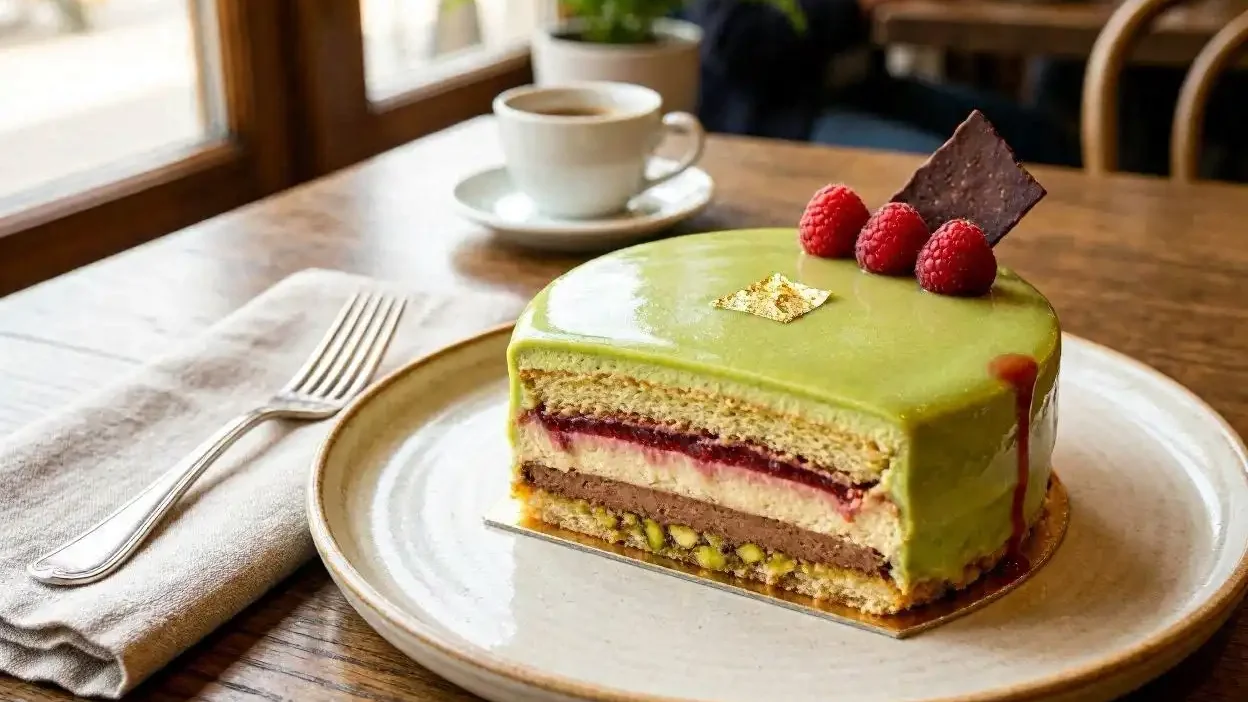
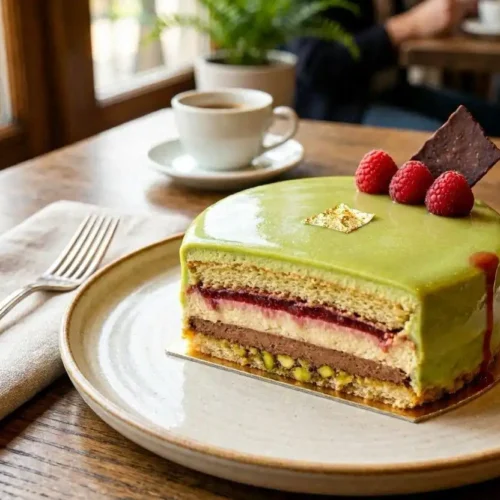
An entremet cake is a showcase of French pastry technique: a composed, molded dessert built from distinct layers sponge, insert, mousse, and a glossy glaze that combine for complex flavors and striking presentation. Understanding this multi-layer architecture is essential if you want entremets that taste as refined as they look.
What Defines an Authentic Entremet Cake
Authentic French entremet cake characteristics center on structure and balance. In short: precise layers, careful assembly, and complementary flavors. Key elements include:
- Multi-layer architecture: Distinct layers deliver different textures and flavors rather than a single homogenous crumb.
- Composed dessert: Entremets are molded and usually set cold, which preserves clean lines and a polished finish.
- Flavor complexity: Thoughtful contrasts rich chocolate against bright fruit purees, for example make each bite interesting.
The multi-layer structure that sets entremets cake apart from traditional cakes
Where a traditional cake is stacked layers of sponge and frosting, an entremet is engineered. A typical layer map looks like:
- Joconde sponge lining the mold (flexible and thin)
- Insert (fruit puree, praline, or ganache) for concentrated flavor
- One or more mousse layers for lift and silkiness
- A mirror glaze or chocolate coating for a smooth, reflective finish
Example: a chocolate-mango entremet might use a cocoa joconde, a tangy mango insert, a milk-chocolate mousse, and a shiny mirror glaze on top—each layer chosen to balance texture and acidity.
Why the entremet vs cake distinction matters for your baking success
Knowing the difference between entremet vs cake changes how you prepare and present your dessert:
- Preparation: Each component (sponge, insert, mousse, glaze) often requires separate techniques and timing.
- Assembly: Because entremets are molded, you must make sure layers are the right consistency and set before proceeding to the next step.
- Tasting experience: The layered approach provides contrasts in temperature, texture, and flavor that a simple frosted cake doesn’t offer.
Essential Components of French Entremet Cake
Every successful entremet balances structure and flavor. The main components and their roles are:
Understanding entremet cake layers and their structural roles
Sponge base: Provides stability and moisture. A thin, flexible joconde is ideal for lining rings. Mousse layers: Provide airiness and flavor; texture depends on egg/cream balance and gelatin. Inserts: Fruit purees, ganaches or praline add concentrated flavor and textural contrast.
The importance of balance between mousse, insert, and sponge base
Balance means proportion: a very dense insert needs a lighter mousse to prevent the cake from feeling heavy; conversely, a thin jelly insert should be supported by a firmer mousse. This harmony creates pleasant texture and a cohesive flavor arc from top to bottom.
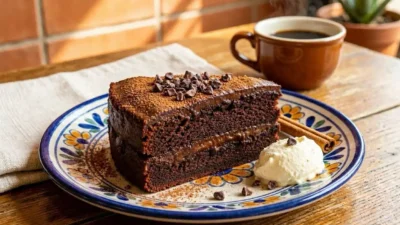
How entremet chocolate cake achieves its signature texture profile
An entremet chocolate cake typically pairs a velvety chocolate mousse (for depth) with a delicate cocoa sponge (for lift) and a crunchy praline or feuilletine layer (for contrast). The result is a layered mixture of silk, sponge, and crunch that sings together when proportioned correctly.
2. How to Make Entremet Cake: Essential Tools and Ingredients

Before you build your entremet cake, gather the right tools and high quality ingredients. Precision equipment makes the difference in entremets, and the ingredients you choose especially chocolate, cream, and fruit define the final flavor and texture.
Must-Have Equipment for Entremet Baking
Tools help you work cleanly and consistently. Key items:
- Digital scale: Measure ingredients to the gram—entremet recipes often use metric weights for predictable results.
- Cake rings & silicone molds: Stainless-steel rings give sharp edges and stability; silicone molds allow creative shapes. Use acetate strips to line rings for smooth sides.
- Stand mixer or handheld mixer: For whipping creams, egg whites, and making stable mousses and batters.
- Instant-read thermometer & digital probe: Temperature control affects mousse stability and glaze viscosity—measure precisely.
- Silpat mats, parchment & flat baking sheets: Prevent sticking and ensure even baking of sponge layers.
Selecting proper cake rings and silicone molds for clean edges
Stainless rings are reliable for classic entremets; use silicone for domes or shaped minis. Always line the ring with parchment or acetate and make sure the sponge fits snugly for neat layers.
Temperature control tools for precision in French pastry recipes
A thermometer matters more than intuition here: check chocolate, syrup, and glaze temperatures with an instant-read probe. For mousse, chilling bowls and equipment helps achieve the right cream and egg white volume.
Key Ingredients for Your Entremet Mousse Cake
Choose ingredients that lend stable texture and bright flavor. Essentials include:
- Quality chocolate: For chocolate entremet variations, choose couverture chocolate with good cocoa butter content—it melts smoothly and benefits coatings and ganaches. Note: tempering is necessary for glossy chocolate decorations but not for mirror glaze.
- Fresh fruit: Ripe strawberries, mangoes, or raspberries make vibrant purees and inserts—strain for a smooth texture.
- Dairy and alternatives: Use heavy cream for classic mousses; coconut cream and plant-based gelatin substitutes (agar-agar, vegan pectin blends) work for dairy-free versions—check conversion rates when substituting gelatin.
Quality chocolate selection for chocolate entremet cake perfection
Look for 55–70% cocoa solids for balanced chocolate mousse; higher cocoa gives more intensity but may need extra cream or sugar to balance. Buy couverture where possible for smoother ganache and shine.
Fresh fruits for strawberry entremet cake and mango entremet cake variations
Make purees by blending ripe fruit and sieving to remove seeds. To set fruit inserts, bloom gelatin in cold water, dissolve, and mix into the puree; for vegan options, follow agar instructions carefully.
Alternative sweeteners and dairy-free options for broader accessibility
Swap sweeteners (e.g., coconut sugar or erythritol) and use coconut cream for mousse to serve dairy-free guests. When using gelatin substitutes, test small batches to confirm texture—they don’t always behave identically to animal gelatin.
Quick shopping list (for one 8–10″ entremet)
Suggested quantities (approx.): 250 g sponge flour/sugar/almond mix, 400 g quality chocolate (for mousse & glaze), 600 ml heavy cream, 400 g fruit puree, 12 g powdered gelatin (or vendor-recommended vegan substitute), 200 g sugar, 50 g butter. Convert to oz if needed.
Safety & allergen notes: recipes may use raw egg whites—use pasteurized eggs if concerned. Label any nut ingredients (almond/joconde) for guests with allergies.
With these tools and ingredients ready, you’re set to move to mousse recipes and layer assembly—see the mousse and mirror glaze sections for step-by-step recipes and timing guidance to get perfect results.
3. Chocolate Entremet Cake: Creating the Mousse Layers
The mousse layers are where an entremet cake becomes memorable—providing airy texture, flavor depth, and contrast to the sponge and inserts. Below you’ll find clear techniques for both chocolate and fruit-based mousses, plus practical tips to keep them stable during assembly.
Mastering Chocolate Mousse Cake Filling
Technique and temperature control are critical for a light, stable chocolate mousse. Use high-quality chocolate and precise whipping to create a glossy, airy mousse that holds its shape inside the entremet.
Proper whipping technique for stable, airy mousse texture
Whip egg whites (or whipped cream) in a clean, dry bowl—no yolk or grease. For egg whites, whip to glossy, stiff peaks; for cream, whip to soft–medium peaks (so it still folds easily). When folding, use a gentle double-fold motion and combine gradually: fold one-third to loosen the chocolate, then fold the remaining whites/cream in two additions to preserve air.
Temperature management during chocolate preparation
Melt chocolate gently over a double boiler or in short microwave bursts. Aim for a melted chocolate temperature around 90–95°F (32–35°C) before combining with whipped components—cooler than body temperature but still fluid. If chocolate is too hot it will deflate whipped whites/cream; if too cool it can seize. For milk or dark chocolate mousses, heat cream on the stove (in a saucepan) to about 140°F (60°C) before pouring over chopped chocolate to make a ganache base.
Quick micro-steps (chocolate mousse):
- Chop 200–400 g chocolate and warm 150–250 ml cream to ~140°F (60°C); pour over chocolate and stir to make a smooth ganache.
- Cool ganache to ~95°F (32°C).
- Whip 200–300 ml cream to soft peaks (or whip egg whites to stiff peaks if using a mousse that relies on whites).
- Fold one-third whipped cream/whites into the ganache to loosen, then gently fold in remaining cream until homogeneous—do not overmix.
Light Mousse Variations for Mango Entremet Cake Recipe
Fruit mousses highlight bright, fresh flavor. Mango and other purees are made by blending ripe fruit, sieving for smoothness, and stabilizing with gelatin (or a vegan alternative) so they hold in the entremet.
Fruit puree incorporation methods for vibrant flavors
Bloom powdered gelatin in cold water (follow package bloom time), then dissolve gently and whisk into warm fruit puree. Typical guidance: ~1.5–3 g powdered gelatin per 100 g puree (check gelatin bloom strength and package instructions). For agar-agar or vegan gelling agents, follow manufacturer conversions carefully—the set will differ from gelatin and may require testing.
Achieving the perfect airy consistency in your entremet mousse cake
Whip heavy cream to soft peaks and fold into the fruit–gelatin mixture in two additions: first a small portion to lighten, then the rest to keep the final mousse airy. Chill briefly until slightly set before assembling to avoid sinking into lower layers.
Balancing sweetness with natural fruit acidity
Taste the puree before sweetening. Add sugar or a simple syrup in small increments so you don’t overpower natural acidity. A splash of lemon or lime juice can brighten very sweet fruits and give the mousse a refreshing lift.
Troubleshooting & egg-free alternative
If your mousse deflates: don’t over-fold; cool chocolate/ganache to the correct temperature before folding and ensure whipped elements are at proper peak. If using eggs is a concern, make an egg-free mousse by using stabilized whipped coconut cream or a cream base thickened with a tested amount of agar-agar—whip the coconut cream to soft peaks and fold into the puree/ganache mixture as you would regular cream.
See the Assembly and Mirror Glaze sections for guidance on chilling times and how long to freeze each mousse layer before stacking so you get clean, professional lines in your finished entremet cake.
4. Preparing the Perfect Base for Your Entremet Cake
Your entremet cake’s success starts with a reliable sponge base: it must be even, flexible, and neutral enough to support inserts and mousses. This section explains how to choose the right foundation and prepare it so your layers fit snugly inside cake rings.
Choosing Your Sponge Foundation
The classic choice for entremets is the joconde sponge: an almond-based, flexible sponge that lines molds beautifully. If you prefer a lighter crumb or a different flavor profile, consider genoise for airy lift or a spiced sponge for an entremet carrot cake variation.
Classic joconde recipe for authentic texture and flexibility
A true joconde uses almond flour, sugar, a small amount of all-purpose flour, eggs, and a little melted butter. It’s thin, moist, and flexible—ideal for lining rings or wrapping around molded shapes. Typical bake times vary by oven and pan: aim for a moderate oven (about 200–220°C / 400–425°F) and check after 6–12 minutes depending on thickness—remove when the sponge springs back and is lightly golden. (Adjust times if you use convection or dark pans.)
Alternative bases for entremet carrot cake and lighter variations
Genoise offers a lighter, more cake-like texture that pairs well with delicate fruit mousses. A spiced sponge (with warm spices and grated carrot) creates a distinctive entremet carrot cake—pair with cream cheese–style mousse or brown butter ganache for balance.
Step-by-Step Base Preparation
Follow these core steps to create an even, flexible base that’s ready for layer assembly.
Mixing techniques for even, light sponge layers
Whisk eggs and sugar until the mixture is pale and tripled in volume for genoise; for joconde, fold almond flour and sifted flour into beaten eggs with care to retain air. Gently fold melted butter last to avoid deflating the batter. Avoid overmixing—stop when the batter is homogenous.
Proper cooling, leveling, and trimming methods
After baking, cool the sponge briefly on a wire rack until manageable. Use a serrated knife or a damp spatula to trim dark edges and level the top so you have a clean rectangle or circle that will sit flush against acetate or ring walls. If the sponge is slightly domed, chill briefly to firm it before trimming to reduce crumbs.
Ensuring your base is ready for layer assembly
Before you start layering, check these points: the sponge should be flexible enough to line the ring without cracking, even in thickness, and free of large air pockets. If needed, brush lightly with a neutral syrup to add moisture and help adhesion. Cut templates from parchment paper or use a sheet as a guide to get precise shapes for your rings.
5. Assembling Your Entremet Cake: Layer by Layer
Assembling an entremet cake is equal parts engineering and artistry. Follow a consistent sequence, chill or freeze as directed, and use clean tools so each layer stays distinct and the finished cake has sharp lines and balanced flavors.
Building Stable Layer Structure
Start by lining your ring with the trimmed sponge, then place the insert (fruit puree, praline, or ganache), and top with the appropriate mousse. Repeat as needed for multi-tiered flavor runs. This order—sponge, insert, mousse—helps the cake maintain structure and gives predictable textures in every slice.
Proper sequencing for entremet cake layers that hold together
Make sure each layer is adequately set before adding the next: soft inserts should be slightly chilled; mousse layers should be firm to the touch but not frozen solid. If a lower layer is still soft, the weight of subsequent additions can cause shifting or seepage.
Freezing between layers for clean, professional assembly
Use short, controlled freezes to make handling easier and to achieve crisp lines. Typical guideline: freeze mousse layers on a tray for 20–40 minutes until firm but not rock-hard (timing varies by thickness and freezer). For full assembly, freeze the completed entremet for at least 2 hours (or overnight) before glazing—this ensures the glaze sets quickly and evenly.
Design Considerations for Stunning Results
Think about contrast and balance when choosing colors, textures, and flavors. A dark chocolate sponge with a bright fruit mousse creates visual and flavor contrast; adding a crunchy praline disc introduces a welcome textural surprise.
Creating visual contrast with colors and textures
Layer colors intentionally—light mousse beside a dark sponge will pop when sliced. Texture plays a role too: smooth mousses, glossy mirror glaze, and a crunchy insert (praline, feuilletine) make each bite interesting and make the cake look professional.
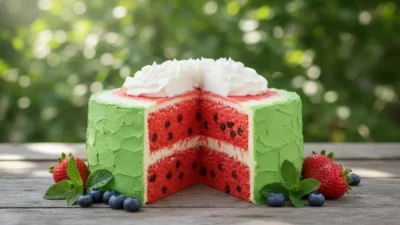
Theme ideas inspired by mermaid cake and watermelon cake aesthetics
For themed entremets, plan color palettes and flavor pairings in advance. Mermaid themes use teal and aqua glazes with tropical fruit mousses (mango, passion fruit). Watermelon-inspired cakes use pink fruit layers with a green-tinted white chocolate glaze—keep flavors complementary to avoid clashing tastes.
Mini entremet cake portions for individual serving presentations
Consider making mini entremets (in silicone molds or small rings) for individual servings; they freeze and glaze the same way as larger cakes but require shorter freeze times (typically 10–25 minutes between layers). Minis are perfect for events and let you experiment with multiple flavor combinations.
Troubleshooting tips: If you notice gaps where sponge doesn’t meet the ring, press a little leftover mousse into the gap and re-freeze. If an insert weeps, chill it longer before assembly or increase the gelatin slightly next time. Make sure the assembled cake is fully firm before moving to the mirror glaze step so the glaze flows and sets cleanly.
When you’re ready, move to the Mirror Glaze section for pouring temperature, techniques, and coloring ideas to finish your entremet cake with a flawless, reflective top.
6. Mirror Glaze Recipe: The Finishing Touch
The mirror glaze is what transforms a finished entremet into a showpiece: a smooth, reflective layer that locks in flavor and gives a professional glossy top. Understanding the ingredients and temperature control will help you get a flawless finish every time.
Understanding Mirror Glaze Chemistry
A classic mirror glaze is a balanced mixture of gelatin, sugar, liquid, and fat (chocolate or cocoa butter and often sweetened condensed milk) that, when heated and cooled correctly, produces a shiny, pourable glaze. Each component plays a role:
- Gelatin: Provides structure and allows the glaze to set; bloom gelatin in cold water before dissolving.
- Sugar (and water): Dissolves to form the syrup base and contributes to viscosity and shine.
- Sweetened condensed milk: Adds body, smoothness, and opacity for a creamier finish.
- Chocolate or cocoa butter: Adds flavor, color depth, and stability—use high-quality chocolate for the best result.
Key ingredients for perfect glossy mirror finish
Use fresh gelatin (note bloom strength), a good-quality chocolate (couverture if possible), and neutral-tasting sweetened condensed milk or cream. Minor ingredient swaps affect texture—if you substitute, test small batches.
Quick mirror glaze recipe (approx. for one standard entremet)
Approximate ingredients (metric): 200 g granulated sugar, 200 g sweetened condensed milk, 200 g water, 150 g chopped white or dark chocolate (depending on color), 12–15 g powdered gelatin (bloomed) — adjust for glaze volume and gelatin bloom strength. (Convert to US units as needed.)
Basic method: Bloom gelatin in cold water. Heat sugar and water to dissolve, remove from heat and stir in condensed milk, then pour over chopped chocolate and let sit for a minute before stirring to melt. Add dissolved gelatin and blend briefly with an immersion blender (avoid incorporating air). Strain through a fine sieve and cool to pouring temperature.
Temperature control for ideal viscosity and flow
Temperature is crucial: aim to pour between 90°F and 95°F (32–35°C) for most chocolate-based glazes—warm enough to flow but cool enough to hold shine. If the glaze is too hot it will be thin and run off; too cool and it will be thick and streaky. Use an instant-read thermometer to check accuracy.
Application Techniques for Professional Results
How you apply the glaze determines the final look. Prepare a wire rack over a sheet pan to catch excess glaze and make sure the entremet is fully frozen or very cold for the cleanest finish.
Pouring methods for even, seamless coverage
Place the chilled entremet on a wire rack and pour the glaze from the center outward in a steady, circular motion. Work quickly and avoid touching the sides. Let excess drip off; place the cake on its serving base once most drips have stopped.
Troubleshooting common glaze imperfections like air bubbles
To prevent air bubbles, strain the glaze and use an immersion blender gently—tap the pitcher to release trapped air before pouring. If small bubbles appear after pouring, gently pop them with a pin or use a small blowtorch held briefly at a distance to smooth the surface (careful with temperature and safety).
Coloring techniques for stunning visual effects
Use gel or powder colors (fat-soluble color for chocolate blends) for vibrant hues. For marbled or galaxy effects, paint thin ribbons of colored glaze onto the main glaze and swirl gently with a skewer. Practice on a small tray first—colors and ratios affect opacity and sheen.
Storage, reheating and safety notes
Store glazed entremets refrigerated for 2–3 days; for longer storage, keep unglazed and glaze just before serving. If glaze thickens, reheat gently in short bursts or over a warm water bath to reach pouring temperature—do not scorch. Label for allergens (gelatin, dairy, chocolate) and refrigerate promptly.
For more detailed troubleshooting (too runny, too thick, dull finish), see the troubleshooting table in the recipe appendix and the Mirror Glaze gallery for visual examples and color ideas.
7. Cookingdom Entremet Cake: Professional Tips for Home Bakers
Baking an entremet cake at home is absolutely possible with the right planning and a few pro techniques. These Cookingdom-style tips focus on timing, troubleshooting, and workflow so you can get consistent, patisserie-quality results without a commercial kitchen.
Time Management During Multi-Layer Preparation
Think in stages and spread work across days to avoid rushing. Breaking the job into clear blocks reduces stress and improves results.
Working efficiently with frozen layers for easier handling
Prepare mousse and inserts in advance and freeze them on a sheet pan until firm—this makes placement in cake rings much easier and reduces damage while assembling. Frozen components also speed up glazing because a cold entremet sets the mirror glaze quickly.
Planning your entremet cake assembly timeline
Sample timeline (adjust for scale):
- Day 1 (2–3 hours): Make sponge and several mousse batches; pipe or pour mousse into molds and freeze layers.
- Day 2 (2–4 hours): Prepare inserts, assemble rings with sponge, inserts and mousses; freeze completed entremet(s) for 2+ hours or overnight.
- Day 3 (1–2 hours): Prepare mirror glaze, glaze frozen entremet, finish decorations, then refrigerate to thaw and serve.
These time blocks allow each component to set properly and give you breathing room for corrections.
Common Mistakes and How to Avoid Them
Even experienced bakers hit snags—here are the most common issues and how to prevent them.
Preventing mousse collapse and glaze issues
Mousse collapse often comes from over-folding, mismatched temperatures, or under-whipped cream. Make sure whipped cream or egg whites are at the correct peak stage and that chocolate/ganache is cooled to ~95°F (32°C) before folding. For glaze problems, ensure the cake is sufficiently frozen so the glaze sets on contact and your pouring temperature is in the recommended range.
Ensuring proper setting times between layers for stability
Rushing layers is the top cause of instability. Give each mousse and insert time to firm—short freezer intervals (20–40 minutes for thin layers, longer for thicker layers) help. Always make sure a layer is firm to the touch before adding the next.
Troubleshooting techniques from Cookingdom experts
- If mousse loses volume: check that components were at correct temperatures; gently re-whip the cream/whites and reincorporate with patience.
- If you have small gaps in sponge lining: press a little leftover mousse into gaps and re-freeze to seal them.
- If glaze breaks or won’t pour smoothly: reheat very gently (short bursts or a warm water bath) to regain viscosity do not boil; strain and remove air before re-pouring.
Extra tips: use a slow, steady assembly pace, keep a tidy workspace (clean spatulas and bowls keep mixtures consistent), and label containers with contents and dates if batching multiple components.
Level: This workflow suits intermediate bakers comfortable with whipping, tempering, and using a freezer strategically. Beginners can follow the same steps but allow extra time and practice smaller batches (mini entremets) first.
When ready, head to the Mirror Glaze section for pouring temperature, glaze quantities, and coloring ideas—these final steps bring together all your work into a stunning entremet cake.
8. Entremet Birthday Cake: Creative Decorating Ideas
Turn a celebration into something unforgettable with a themed entremet birthday cake. These composed desserts are perfect canvases for color, texture, and playful design—while still tasting like a refined patisserie treat.
Themed Designs for Special Celebrations
An entremet birthday cake can reflect a favorite book, hobby, or color scheme. For a Harry Potter birthday cake, for example, choose house colors and simple motifs that read well on a glossy top:
- House colors: Use colored mirror glazes or colored cocoa-butter transfers for crisp house panels (Gryffindor: crimson & gold; Slytherin: green & silver).
- Golden Snitch motifs: Create small chocolate leaves or use edible gold leaf for snitch details—apply sparingly for impact.
- Subtle piping: Add stars, lightning bolts, or minimal line work with a thin ganache or cocoa-butter pen for neat, repeatable patterns.
You can also tailor flavors to the guest of honor: a strawberry entremet cake with bright fruit mousse, or a spiced entremet carrot cake with brown-butter ganache and candied carrot ribbons.
Advanced Decoration Techniques
For a professional finish, combine texture and precision:
- Transfers & stencils: Make colored cocoa-butter transfers on acetate for crisp shapes; chill, peel, and apply to the set glaze or chocolate decorations.
- Fresh fruit & edible flowers: Use ripe strawberries or mango slices for color and flavor; choose edible flowers (violas, nasturtiums) and rinse gently. Note allergy and pesticide considerations—use flowers labeled food-safe.
- Finishing touches: Geometric chocolate shards, a thin ring of ganache, or scattered praline pieces at the base add contrast and highlight the shiny top. Keep accents proportional so the mirror glaze remains the star.
Quick how-to: to make a simple colored cocoa-butter transfer, melt cocoa butter, tint with powdered/fat-soluble color, paint your design on acetate, chill until solid, then flip onto the chilled glaze or chocolate surface and peel the acetate away.
Safety & serving notes: always use food-safe, labeled materials (gold leaf, colored cocoa butter) and be mindful of nut and flower allergens when serving guests. For easy presentation, pre-slice into even pieces and keep chilled until 15–20 minutes before serving so the texture and flavors open up.
Want templates? Try three party-ready ideas: a Hogwarts house panel set, a mermaid-inspired ocean marbled glaze, and a seasonal fruit & floral design—each works beautifully on a chocolate or fruit-forward entremet and makes the cake the centerpiece of the event.
Conclusion
Making an entremet cake is a rewarding, creative project that showcases your baking skills. From precise ingredient measurements to careful layer assembly and a flawless mirror glaze, the process trains you in patisserie techniques while producing a dessert that looks and tastes like a pro-made masterpiece.
Whether you choose a classic opera entremet cake or a playful themed entremet for a birthday, you can adapt flavors—chocolate, fruit, spice—and textures—ganache, praline, silky mousse—to suit any occasion. Expect to spread the work across a few days (prep, assembly, and glazing) and to spend concentrated time on critical steps like mousse whipping and glaze temperature control.
Your first entremet may take longer than a simple cake, but the payoff is big: clean layers, a glossy top, and balanced flavors that will wow guests. Start with a smaller batch or mini entremets if you want quicker practice runs—these take fewer minutes between freezes and let you try multiple flavor combinations without committing to a full-size cake.
Next step: try our chocolate–mango entremet recipe (see recipe section) for a guided, printable ingredients list and timeline. Share your results, download the shopping checklist, and keep practicing—each entremet you make will refine your technique and expand your dessert repertoire. Happy baking!
FAQ
What is an entremet cake?
An entremet is a composed French dessert built from multiple layers—sponge, insert, mousse, and a glossy glaze—designed to be molded and served cold. Quick tip: think in components and plan a timeline so each part sets properly before assembly.
How does an entremet differ from a traditional cake?
Unlike a traditional stacked cake, an entremet is a molded, composed dessert where each layer has a distinct texture and role. Quick tip: line your ring with sponge and make sure inserts are stabilized so layers don’t shift when you unmold.
What tools do I need to make an entremet cake?
Essential tools include stainless steel cake rings or silicone molds, an instant-read thermometer, a digital scale, mixers, and baking sheets with parchment. Quick tip: acetate strips make neat sides and a wire rack over a sheet pan catches excess glaze.
What are the key ingredients for a successful entremet mousse cake?
Use quality chocolate for mousse and ganache, ripe fruit for purees, heavy cream, and a flexible sponge like joconde. Gelatin stabilizes mousses and glazes—follow bloom-weight guidance. Quick tip: weigh ingredients in grams for consistency.
How do I create a flawless chocolate mousse filling?
Make a smooth ganache (warm cream over chopped chocolate), cool it to about 90–95°F (32–35°C), then fold in whipped cream or beaten egg whites gently to preserve air. Quick tip: fold in two additions—one to loosen, one to finish—so the mousse stays airy.
What type of sponge should I use for my entremet cake?
The classic is a joconde (almond sponge) for flexibility and thin lining; genoise is an alternative for a lighter crumb. Quick tip: trim and template your sponge to fit rings snugly before assembling.
What is the best way to assemble an entremet cake?
Layer sponge, insert, and mousse in that order, chilling or briefly freezing thin layers between steps. Finish by freezing the assembled entremet before glazing. Quick tip: freeze mousse layers 20–40 minutes (depending on thickness) so they’re firm but not rock-hard.
How do I achieve a perfect mirror glaze?
Bloom gelatin, heat sugar and water, add condensed milk and chopped chocolate, then incorporate dissolved gelatin and blend gently. Strain and cool to ~90–95°F (32–35°C) before pouring over a very cold or frozen cake. Quick tip: use an instant-read thermometer and strain to avoid bubbles.
What are some common mistakes to avoid when making an entremet cake?
Common errors include over-folding mousse, adding layers before they set, and glazing at the wrong temperature. Quick tip: maintain proper temperatures and allow setting time—patience prevents most problems.
How can I decorate an entremet birthday cake creatively?
Use colored mirror glazes, cocoa-butter transfers, edible flowers, and small chocolate accents to match a theme (e.g., Harry Potter or mermaid). Quick tip: apply delicate transfers to a chilled surface and use food-safe materials; always note allergens for guests.